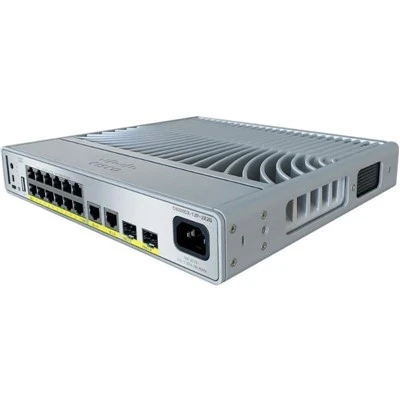
Wiring a three-way switch can seem like a daunting task, especially if you’re not well-versed in electrical work. But fear not! As a seasoned switches supplier, I’ve seen firsthand how a little knowledge can go a long way in making this project manageable. In this guide, I’ll walk you through the process step by step, sharing tips and insights along the way. Switches
Understanding Three – Way Switches
Before we dive into the wiring process, it’s crucial to understand what a three – way switch is and how it functions. A three – way switch is a type of electrical switch that allows you to control a single light or a set of lights from two different locations. This is commonly used in hallways, staircases, and large rooms where you need to turn the lights on or off from either end.
Unlike a standard single – pole switch, which has two terminals, a three – way switch has three terminals: one common terminal and two traveler terminals. The common terminal is usually darker in color, such as black or brass, while the traveler terminals are typically the same color, often brass.
The key to the three – way switch system is the interaction between the two switches. When you flip one switch, it changes the electrical path, and when you flip the other switch, it can either complete or break that path again, allowing you to control the light from either location.
Tools and Materials You’ll Need
To wire a three – way switch successfully, you’ll need the following tools and materials:
- Three – way switches: Make sure to choose high – quality switches from a reliable supplier. As a switches supplier, I can attest to the importance of using switches that are built to last and meet safety standards.
- Electrical wire: You’ll need 14/3 or 12/3 cable, depending on your electrical load. The 14/3 or 12/3 cable contains three insulated wires (usually black, red, and white) plus a bare copper ground wire.
- Screwdriver: A flat – head and a Phillips – head screwdriver are essential for removing and installing switch plates and connecting wires.
- Wire strippers: These are used to remove the insulation from the ends of the electrical wires.
- Voltage tester: This tool is crucial for ensuring that the power is off before you start working on the switch.
- Electrical tape: Used to insulate the wire connections and prevent electrical shocks.
- Junction box: This is where the switches and wire connections will be housed.
Safety Precautions
Working with electricity can be dangerous, so it’s essential to take the following safety precautions:
- Turn off the power: Before you start any wiring work, turn off the circuit breaker that controls the power to the area where you’ll be working. Use a voltage tester to double – check that the power is off.
- Wear protective gear: Wear rubber gloves and safety glasses to protect yourself from electrical shocks and potential injuries.
- Follow local electrical codes: Make sure your wiring work complies with the electrical codes in your area. If you’re unsure, consult a licensed electrician.
Step – by – Step Wiring Process
Step 1: Remove the Old Switches
If you’re replacing existing switches, start by removing the switch plates using a screwdriver. Then, remove the screws holding the switches in place and gently pull the switches out of the junction box. Take note of how the wires are connected to the old switches, as this will help you with the new wiring.
Step 2: Prepare the Wires
Using wire strippers, remove about 3/4 inch of insulation from the ends of each wire. If you’re using 14/3 or 12/3 cable, you should have three insulated wires (black, red, and white) and a bare copper ground wire.
Step 3: Connect the Ground Wires
Connect the bare copper ground wires from the cable to the green grounding screws on both three – way switches. If there is a ground wire in the junction box, connect it to the other grounding wires as well. Secure the connections with wire nuts and wrap them with electrical tape for added safety.
Step 4: Connect the Wires to the First Switch
The first three – way switch is usually the one closest to the power source. Identify the common terminal on the switch (usually darker in color). Connect the black "hot" wire from the power source to the common terminal.
Connect the two traveler wires (usually red and black or red and white) to the two brass traveler terminals on the switch. Make sure the connections are secure by tightening the terminal screws.
Step 5: Run the Cable to the Second Switch
Run the 14/3 or 12/3 cable from the first switch to the second switch location. Make sure the cable is properly routed and not pinched or damaged.
Step 6: Connect the Wires to the Second Switch
At the second switch location, identify the common terminal again. Connect the black wire that goes to the light fixture to the common terminal.
Connect the two traveler wires (the same ones that were connected to the first switch) to the two brass traveler terminals on the second switch.
Step 7: Reinstall the Switches
Carefully tuck the wires back into the junction boxes and reinstall the switches. Secure the switches with the mounting screws, then attach the switch plates.
Step 8: Turn on the Power
Once you’ve double – checked all the connections, turn the circuit breaker back on. Test the switches to make sure the light turns on and off from both locations.
Troubleshooting
If the light doesn’t work after you’ve completed the wiring, don’t panic. Here are some common issues and solutions:
- Loose connections: Check all the wire connections to make sure they are tight. Loose connections can cause the circuit to break, preventing the light from working.
- Wrong wire connections: Make sure the wires are connected to the correct terminals on the switches. The common terminal should have the "hot" wire or the wire going to the light fixture, and the traveler terminals should have the traveler wires.
- Burned – out switch: If one of the switches is burned out or defective, it may need to be replaced. As a switches supplier, I can provide you with high – quality replacement switches.
Why Choose Our Switches
As a reliable switches supplier, we take pride in offering a wide range of three – way switches that are designed for durability, performance, and safety. Our switches are made from high – quality materials and undergo rigorous testing to ensure they meet the highest standards.
When you choose our switches, you can expect:
- Exceptional quality: Our switches are built to last, with long – lasting contacts and robust construction.
- Safety features: We prioritize safety, and our switches are designed to prevent electrical shocks and short circuits.
- Easy installation: Our switches are designed with user – friendly features, making them easy to install even for those with limited electrical experience.
If you’re planning a three – way switch wiring project or need to replace existing switches, we’re here to help. Our team of experts can provide you with the right products and advice to ensure your project is a success.
Contact Us for Procurement and Consultation
Are you interested in purchasing high – quality three – way switches for your next project? Do you have questions about the wiring process or need technical support? We’d love to hear from you. Contact us to start a conversation about your procurement needs. Our sales team will be more than happy to assist you with product selection, pricing, and delivery options.
Firewalls for Juniper Let’s work together to ensure your electrical projects are safe, efficient, and successful.
References
- Wiring Simplified, 10th Edition by Robert W. Kemmeter.
- Electrical Wiring Residential, 19th Edition by Ray C. Mullin and Phil Simmons.
AITI Tech Limited
AITI Tech Limited is one of the most professional switches manufacturers and suppliers in China for over 20 years, featured by quality products and low price. Welcome to buy bulk discount switches in stock here from our factory. If you have any enquiry about pricelist, please feel free to email us.
Address: 6F, Haogong Building, Yannan Road, Futian District, Shenzhen, China
E-mail: kelly@hkaiti.com
WebSite: https://www.hkaiti.com/
